How To Adjust Starplan Kitchen Drawers
Care Guidelines For Granite and Stone Work Surfaces
Please find the following care guidelines for looking after the work surfaces
Granite worktops must not be rubbed with abrasive materials such as metal pads, scouring detergents and wire wool or alkaline and chlorine based cleaners or bleach. Instead, wash with clean, warm water to which a non-abrasive light neutral detergent (PH7) may be added. Rinse with clean warm water and dry with a chamois leather or similar.
Liquids spilt on your granite worktops should be mopped up immediately. The most risk is from highly alkaline or acidic liquids (such as lemon juice or vinegar), oil based substances (such as butter and cooking oils – hot oil splattering from cooking pans around the cooker), wine, detergents and alcohol.
Do not allow any build up of salt or detergent on your granite worktop.
Granite worktops should not be brought into contact with strong acids or chemicals including paint stripper, brush cleaner, oven cleaner, nail varnish remover, degreaser or similar products.
For a longer lasting finish the granite worktop surface can be sealed to reduce its natural porosity.
Do not hit your granite worktop with blunt or heavy objects. It can crack, chip or even break (the edges are most likely to be damaged if physically abused).
We would advise the use of a chopping board as a preparation centre to reduce the risk of damage to your granite worktop.
Do not expose your granite worktop to excessive heat – we advise the use of a table mat or similar to place your pans on when taken directly from the hob.
Care Guideline For Silestone Work Surfaces
General Usage Advice Routine Cleaning and Maintenance
Due to their low porosity, Silestone® and ECO Line Colour Series surfaces are highly resistant to household stains. Cosentino recommends you use Q-Action* to clean its Silestone® and ECO Line Colour Series surfaces. If you don’t have this product, the best option is to use water and neutral soap. You should then finish off by rinsing the surface with plenty of water and drying it with kitchen paper or a clean cotton dish towel.

Cleaning Stubborn Stains
When faced with stubborn stains, the best way to fix it depends on the type of stain. The most usual cases are:
Grease stains - apply Q-Action or similar (dishwasher soapy product) onto the stain and rub it with a sponge until it disappears. Repeat the process if necessary. Next, rinse with a generous amount of water and dry the affected area.
Limescale - use cleaning vinegar and a damp sponge. If the stain persists, you can use a limescale remover that has been diluted with water. Never leave it on for more than 2 minutes. Repeat the process if necessary. Rinse with plenty of water and dry with kitchen paper or a clean cotton dish towel.
Silicone and putty stains - we recommend you remove the stains as soon as they appear. To do so, use a knife held horizontally and CleanColorsil, and scrub with a sponge. If you don’t have any CleanColorsil, you can use any silicone remover. Afterwards, rinse with plenty of water and dry.
Cleaning difficult stains - for difficult stains, pour some Q-Action (or a similar product) onto the affected area and leave for 2 minutes. Next, scrub with a gentle scouring pad (for glass-top cookers, use the blue type) and rinse with plenty of water and dry. If the stain persists, contact the fabricator or studio who supplied you with your Silestone materials.

Response to impacts - one of the most notable features of these surfaces is high impact resistance. However, you should avoid impact to those areas that are less resistant and more sensitive to impact, for example along the edges.
Avoiding heat damage - after using certain kitchen utensils, such as frying pans, pots and other items that give off heat, do not place them directly onto the surface. Instead, you should use a table mat (a rubber one, if possible) until the utensils have cooled down. This is because the sharp difference in temperature (between hot and cold) can damage the surface.
Precautions for general use
Do not leave water on the surface for long periods of time. The most susceptible areas are those that are close to sinks.
Do not leave water on the surface for long periods of time. The most susceptible areas are those that are close to sinks.
Do not use sharp objects to cut directly on the worktop surface. Instead, use other protective materials such as chopping boards.
Do not place the surface outside or anywhere that may be exposed to high levels of ultraviolet radiation.
Do not place any objects that give off heat, or that have been recently removed from the cooker, onto the surface. Use a trivet or table mat.
Do not use water-repellents, sealants, polishes or similar products.
Do not polish the surface.
Do not place heavy objects that are unsuitable for worktop use onto the surface.
Do not use paint strippers, caustic soda or any products with a pH greater than 10. If you use bleach or solvents, you should rinse the surface with plenty of water. Never leave such products in permanent contact with the surface, as they may affect it after 12 hours. Avoid the use of any chlorine-based products and any contact with hydrofluoric acid.
Do not use grease removers with a high mineral content, or very strong products containing 50% solutions of hydrochloric acid or sodium hydroxide.
Do not use any cleaning products that have a mineral content or that include microparticles in their composition.
Do not use any scouring pads that may scratch the surface. Use a cleaning sponge.
Examples of products that you must not use on Silestone and ECO Line Colour Series surfaces: paint strippers, oven-cleaning products, cleaning products containing methylene chloride, acids for unblocking plugholes or nail-polish removers containing acetone.
If any of these products are spilled onto the surface, remove them as quickly as possible using plenty of water and neutral soap.
The use of these types of products may result in the loss of the product warranty.
Cleaning silicone and glue
During the fabrication (mitre cutting, laminating, general cleaning of pieces) and the counter top installation (joints, splash backs, etc.) where glues, adhesives and silicone are used, we recommend to clean afterwards (maximum 30 minutes after gluing). To do so, use clean cotton cloths or paper. Use CleanColorsil (Cosentino’s complementary product) as a silicone and adhesive cleaner; Isopropyl Alcohol or Isopropanol (cleaning alcohol) or ethanol may be used instead.
Not recommended products
Products such as solvent or acetone should not be used for cleaning worktops or slabs. Scouring pads should not be used. It is advisable to use micro fibre cloth or wet paper.
Kitchen Door Care
KITCHEN DOOR CARE & MAINTENANCE
With the appropriate care and maintenance, our kitchen doors and components are designed to provide many years of reliable service. To help keep it in the best possible condition please follow the simple guidelines below.
INSTALLATION ADVICE
NOTES FOR THE INSTALLER
Pre Installation:
Ensure that all new-builds or newly plastered rooms have been left to environmentally stabilise prior to the installation of new kitchen doors. Kitchen doors must not be installed into a damp, or moisture-rich environment as it will cause undesirable movement in the joints and panels of the door. A hygrometer should be used to assess conditions.
To help to minimise any potential damage to the kitchen whilst you are installing it, please read and adhere to the following instructions and recommendations.
We would advise that you make an initial check to confirm that you have the correct quantity and sizes of fascia’s; you can do this by referring to the labels attached to the outer packaging.
The fascia’s should be stored flat and away from the working area. Take extreme care when stacking the fascia’s with hinges attached, to ensure that the hinges do not mark other fascia’s. Do not lean the fascia’s against one another, or against any surface without proper protection in-between.
Ensure that you fully inspect each individual fascia prior to attaching the hinges. Claims for damage to the fascia will not be accepted after the hinges have been attached.
Take extreme care when unpacking the fascia’s and do not use sharp blades to cut away the packaging.
When attaching the hinges, place the fascia face down on a soft clean surface, ensuring that there is no grit, sawdust or other matter underneath than can damage the surface of the fascia whilst the hinges are attached. It is good practice to place a sheet of clean cardboard between the fascia and the fiat surface prior to attaching the hinges.
If the hinges are ‘knock-in’ type. Use a rubber mallet to knock the hinges into the fascia without using excessive force.
Once the hinges have been attached to a door, hang the door on the unit straight away to avoid damage. Do not stack the doors with the hinges touching other doors, as this can causes scratches or marks to the other fascia’s.
Do not stack the doors on their ends on any hard surface; this can cause chipping and scratching along the edge of the fascia, especially on the handle edge of ranges with an integral handle. Prior to fitting, the fascia’s should be stored flat, ensuring that they are not resting on any dirt or debris that may damage or mark the finish.
You should take extreme care not to put the door down with excessive force on any edge, especially the handle edge, as this will cause crushing/impact damage on these edges.
Take extreme care not to put the door down on any hard or rough surface such as bare concrete floors, or on any debris such as sawdust, grit or screws, as this can damage the product.
If the fascia’s are attached to the carcase, then you should carefully remove the fascia’s by unclipping the hinges, and storing these, flat in a clean safe environment away from your working area, utilising the packing materials from the units.
Where cutting/scribing decor panels and trim, you must use a sharp quality saw blade of the appropriate grade for fine-cutting, or a suitable router. Small chips can appear along the cut-edge, and so extra care must be taken to minimise the risk of chipping. Using a blunt or inappropriate saw blade will produce a poor finish, and this will not be covered by the guarantee.
On painted products – Any fine chips along the cut edge should be smoothed with a fine grade sand paper prior to fitting.
All cut edges should be sealed against moisture ingress, using a suitable water resistant sealant/adhesive prior to installation.
All trims are supplied in long lengths and need to be cut down on site, and again it is important that this is done using the appropriate tools.
When fitting the plinth, ensure that you check the dimensions of any adjacent appliances.
On occasion, the plinth may need to be pulled forward to ensure that it clears the front of the appliance. This can be achieved by fitting blocks using off-cuts to the rear of the plinth prior to attaching the plinth clips, to step the plinth forward from its normal position.
General Care
As with all kitchen furniture, the most common problems found occur as a result of excessive or prolonged exposure to heat and/or moisture. Always ensure that water is not left around sink areas as damage caused as a result is not covered by the guarantee.
Always wipe off excess moisture and be careful with extreme heat sources, such as kettles, ovens and toasters. It is recommended that these heat sources are not placed directly under wall units when they are in use; they generate a higher level of heat and moisture than is often appreciated and can quickly and easily lead to damage of the furniture.
Don’t place appliances that create steam (e.g. steamer, coffee maker or kettle) underneath the cabinets so that the steam flows up against the underside of the cabinet and doors.
If using glass cleaner to clean your glass doors be careful not to damage the finish of the door and cabinet parts while cleaning. Do not spray glass cleaner directly on to the glass or cabinet parts as this may discolour the finish of your kitchen cabinets. Instead, spray a small amount of cleaner on to a lint free cloth or paper towel then wipe the glass.
Don’t open the door of the dishwasher immediately after the programme has ended, as exposure to heat and the high humidity increases the risk that the door may absorb moisture and swell.
Please note that after a period of time it is quite normal for the colouring of kitchen units to mellow in colour. This is not a manufacturing fault and is as a result of exposure to light.
This means that any additional parts subsequently ordered for your kitchen, or supplied as replacements may not be an exact colour match. However, any additional parts supplied will also mellow over time to blend with your existing units.
The colour of doors and drawer fronts may appear mismatched in colour. This apparent mismatch is sometimes the effect of differing light conditions within your kitchen (known as metamerism). To check your doors and fascia you should place them side by side in natural daylight for comparison.
Cleaning advice for all door types including timber, painted, foil, stainless steel & vinyl:
Do not use wax-furniture polish, abrasive or aggressive cleaners, bleach or other hypochlorite (chlorine) based cleaners, multipurpose cleaners, dilutes, acetone, alcohol, solvent or similar products on the door, as this will damage the surface. Additionally wax and polishes leave a residue build up that is difficult to remove.
Only use a 5% soap, 95% water (liquid soap) solution, wiping with a damp (not wet) cloth, finally drying with a soft clean cloth only.
Ensure all cooking splashes are wiped immediately with a damp cloth; and dust with a soft cloth only.
Never use any abrasive pads or abrasive cleaners of the furniture. Spills and condensation on the fascia’s/panels should be cleaned and dried immediately.
Timber & Veneered Doors
Cleaning: When cleaning timber doors you must follow the pattern of the grain. It is advisable to use a damp (not wet) cloth to remove fingerprints and marks, followed at once with a clean and dry soft cloth.
Moisture: Excess moisture can damage a timber product – it is recommended that susceptible areas such as around the sink are thoroughly maintained and kept dry at all times.
Light: Timber changes colour when exposed to light. Light, lacquered surfaces also have a certain tendency to “yellow with age” depending on the exposure to light. The species of timber and intensity of exposure will affect the rate of change. Due to this we recommend that timber samples be changed regularly.
It is advised that colour change is taken into consideration when replacing or fitting new doors some time after the original kitchen has been installed.
PVC & High Gloss Finished Doors
PVC/Lacquer coated products are manufactured from the highest quality materials. Your gloss doors will come with a protective film over the front. You should remove this only after they are installed as the curing process continues for around 72 hours after the film is removed. This means the doors will be liable to scratching and other marks. You should avoid cleaning the doors for at least a few days to prevent any marks appearing on the surface.
Moisture: Please be careful not to puncture the PVC/melamine lacquered surface of your panels. These should be kept dry in order to prevent moisture ingress.
Cleaning: Periodically clean the interior and exterior surfaces of the door using a soft, damp cloth. Wipe dry all surfaces after cleaning. Use only cleaning agents that are intended for the materials used in your kitchen. There are a number of products available which are designed for cleaning high gloss doors, but plain water is also good for regular cleans. Always use a lint free soft cloth and use a circular motion to achieve a high buff. Micro-fibre cloths are also perfect for achieving a high shine with very little effort.
Avoid any agents that contain ammonia, alcohol, bleach or an abrasive. If the surface of the product is exposed to any oil based substance (for example olive oil, butter, margarine or cooking oil), the spillage must be wiped away immediately to prevent staining.
High gloss doors do sometimes show fingerprints – but this is easily taken care of with a soft cloth. Grease marks caused by these oil-based products can easily be removed by use of a mild detergent, non-abrasive cleaner if used immediately after spillage has happened. Abrasive cleaners are not recommended for this type of product.
Do not expose the doors or panels to temperature in excess of 60C (140F) (Approximately the temperature of washing up water).
Light: If the doors are supplied with a protective film on the face they must not be directly exposed to sunlight. Once installation is complete, carefully remove the protective film from the front of the fascia. We also advise that colour change is taken into consideration when replacing or fitting new doors some time after the original kitchen has been installed.
Painted Doors
Cleaning: it is advisable to use a damp (not wet) cloth to remove fingerprints and marks, followed at once with a clean and dry soft cloth. Any form of furniture polish or other cleaning products should be avoided.
Light: painted finishes will change colour when exposed to light – the intensity of exposure will affect the rate of change. Due to this, we recommend that painted swatches and door samples be changed regularly.
We also advise that colour change is taken into consideration when replacing or fitting new doors some time after the original kitchen has been installed.
Stained Doors
Uform’s range of stains are protected by an application of lacquer.
Cleaning: it is advisable to use a damp (not wet) cloth to remove fingerprints and marks, followed at once with a clean and dry soft cloth.
Light: stained finishes will change colour when exposed to light – the intensity of exposure will affect the rate of change. Due to this, we recommend that stain swatches and door samples be changed regularly.
We also advise that colour change is taken into consideration when replacing or fitting new doors some time after the original kitchen has been installed.
Sanded (raw) Doors
Cleaning: sanded products are unfinished and therefore the care of these doors will depend on the type of finish applied, eg paint, stain, wax etc., see above for care guidance.
Please note your guarantee may be adversely affected if used for non-general domestic environments. Please see Terms & Conditions page for details of the guarantee.
UFORM PRICE LIST I APRIL 2017 I NORTHERN IRELAND 11
Care Guidelines For Dekton Work Surfaces
Cleaning & Maintenance for Kitchen Worktops
Normal Maintenance
Due to its very low porosity, the ultra-compact Dekton® surface is highly resistant to staining in day-to-day use and from chemical products, making it ideal for use as a kitchen worktop and as a surface for other kinds of work, both inside and out. For general cleaning, Cosentino recommends the use of Q-Action with a sponge or a sponge with soft fibres. If this product is not available, the best option is to use a neutral soap and water.
Cleaning Stubborn Stains
In the case of aggressive stains, either from products that are resistant to normal cleaning agents or because they have remained on the work surface without being removed, we recommend using more specific products such as: solvents (acetone or universal solvent type). The accompanying table shows the various types of stains with their corresponding cleaning products.

Acid cleaning products can include any of product that contains acid or descaling agent etc. Alkaline products include basic cleaning agents, ammonia etc.
Solvents can include products such as universal solvent, turpentine(white spirit), acetone, alcohol etc. Oxidants include products such as hydrogen peroxide and diluted bleach.
Prevention of Knocks
Although Dekton® is an extremely resistant surface, knocks should be avoided in areas which are more exposed (corners, edges, bevels etc.).
Performance in Contact with Hot Objects
Objects such as frying pans, saucepans, casseroles and coffee makers etc. can be placed directly on the work surface after use. Electrical apparatuses which give off heat can also be placed on the unprotected surface. Dekton® is designed to withstand utensil temperatures from domestic use.*
Precautions
Avoid direct contact with metal parts of electric broiler, cooking worktops or ovens that, in a bad installation get directly in contact with the material.
Avoid direct radiations in very high temperature such as chimney, barbecues, etc.
Avoid direct contact with flame.
For Dekton Xgloss, avoid long contact with industrial objects in very high temperatures.
Do not polish the surface.
Avoid the use of metal sponges or abrasive particles.
Avoid direct cutting on the surface with ceramic knife, as they are a material with similar hardness to the top.
For Dekton Xgloss avoid the direct cutting on the surface.
For Dekton® 8 mm it is necessary to use protection for hot objects.

Care Guidelines For Axiom Work Surfaces
Dishwashers and Washing Machines
Every Axiom worktop is supplied factory sealed along the front underside edge.
Integrated dishwashers and washing machines emit steam and moisture on a regular basis. It is recommended that extra protection should be given to worktops which have these appliances underneath. Extra sealant or a baffle plate should be placed on the underside of the worktop for extra protection. Consult the appliance manufacturer for further details.
General
Axiom worktops are rigorously tested in line with British and European standards to ensure that they meet the exacting requirements of any modern kitchen. Every Axiom worktop therefore incorporates specific features which make it highly resistant to heat, impact, scratching and moisture. Our decorative laminates are tested to a temperature of 180ºC. Boiling water and cooking splashes will therefore do no harm to the surface of the worktop. All Axiom worktops are effectively sealed to protect the core from moisture along the front and back edges.
Cleaning
General cleaning of the surface requires only a damp cloth and a mild detergent or non-abrasive cleaner diluted in warm water. Abrasive scouring powders, creams and even polishes should be avoided. If the worktop has a textured surface, a soft nylon nailbrush can be used to ensure a more thorough cleaning. Potentially persistent stains should be removed immediately. For Gloss worktops, buff the surface after cleaning with a soft cloth. Due to the delicate nature of Gloss surfaces, they may scratch more easily, which means additional care must be taken.
Things To Do And Things To Avoid

Lifetime Guarantee of Quality
Formica Group offers a lifetime guarantee for any Axiom® worktop which is shown to be defective in either materials or manufacture only, and will undertake to replace any worktop with a manufacturing defect. Due to the inherent properties of Gloss and Platinum Etchings laminate, Formica Group cannot accept any responsibility for the performance of the laminate surface.
PLEASE NOTE: The lifetime guarantee becomes void once the post formed edge has been cut off.
PLEASE NOTE: This installation and maintenance guide has been developed for guidance only. Formica Group cannot accept responsibility for the final fitting of your worktop. Colour and surface finish should be checked before installation. Formica Group will not accept any claims for re-fitting costs resulting from mis-matched surface colours or finishes.
Starplan Guarantees & Warranties
Bedroom Drawer Adjustment

Underneath the drawers you will find a locking pin on each of the 2 drawer runners. This locking pin is shown in the image above near the front of the runner and holds the drawer in position.

Pull the locking pin on both drawer runners away from the centre of the drawer to unlock like above. To remove the drawer, it should now be lifted up and pulled towards you, see 3 images below.


Shown above is the up and down toggle which is used to adjust the height of the drawer.

Turn the toggle anti-clockwise to raise the height of the drawer and clockwise to lower the height of the drawer.
To put the drawers back in position just repeat the above process in reverse
Starplan Extractor fan Buyers guide
Below is a guide to key info you may need to consider when choosing your extractor fan. We will cover the main topics that are relevant for a customer making an informed choice. Extractors come in many different shapes and forms and the extractor you choose will often just come down to looks but it also has an important role in the kitchen.
Ducted or Recirculation – Sometimes it is not possible to duct out the air flow from an extractor and you may have to choose a filtered extractor. This type of extractor is still effective for removing odours but is traditionally not as good as a ducted extractor. Humidity and condensation around your cooking area may still be an issue if you choose a filtered extractor. Structural factors in your Kitchen may dictate which type of extractor you are able to go for.
Ducting Sizes – Many Extractor manufacturers recommend 6 inch (150mm) ducting and where possible we will fit 6 inch ducting however if the ducting needs to run along the top of your wall units in order to reach an outside wall then we will often reduce the ducting to 5 inches for cosmetic reasons. Most people do not want the ducting to be visible above their units and 6 inch ducting can be unsightly. The consequences of reducing the ducting to 5 inch is the fan may become nosier as the internal fan has to work harder to expel the air. Some manufacturers will even go as far as advising against 5 inch ducting or less and will void the fans warranty should the wrong diameter be installed. If 6 inch ducting is required Starplan can box in the ducting to hide it and the customer can then decorate to suit. This will be an additional charge at the time of purchase.
Decibels – The noise levels of an extractor hood can be critical depending on how you use your kitchen. For some, the kitchen is a completely separate room in the house and is for cooking only. Some houses may incorporate a dinning or seating area within the kitchen. These factors should be taking into account when buying any extractor or any appliance that makes a noise. Like any product you get what you pay for and the quietest extractors are often most expensive. All fans have a decibel (db) rating that helps you compare models. Filtered fans are often louder than vented fans and fans vented out using a smaller diameter ducting may be louder than the manufacturers rating. The size of your kitchen can also play a part in how loud a fan may sound. The length of the ducting and number of bends can also have an impact on how loud a fan may sound.
Flow extraction rates – Manufacturers of extractors will often provide an airflow rating (m3/h). Many manufacturers sign up to a European standard. This flow rate is to help you make an educated choice as to what fan you should purchase. Again the more expensive the fan then usually the better the flow rate. There are many online calculators that will help you work out the size/volume of your kitchen and therefore how much extraction you will need from an extractor fan. See example calculation.

CHOOSING THE RIGHT EXTRACTOR
USE – Extractors are designed to remove grease, odours and vapours. To achieve the best result when using which ever extractor you choose, we recommend switching on the extractor 10 minutes before cooking and to leave it running 15 minutes after you have finished. This will ensure that the air in the kitchen is being circulated before cooking commences and the air continues to be cleaned for a short while after, giving you the best results.
MOISTURE – A large amount of water is used when cooking food such as rice, pasta or soup on the hob. Water boils at a temperature of approximately 100oC and then releases a large amount of steam. This releases approximately 1.5 litres of moisture into the kitchen over the course of a day. Once the air in the room is saturated with water vapour, the steam condenses on walls, windows and furniture. If this moisture remains in the room, it can lead to excess humidity and therefore to the formation of mould, structural damage and swollen, distorted wood (kitchen fittings), as well as creating an unpleasant and unhealthy room climate. In energy-efficient houses, it is particularly important to provide an efficient means of removing moisture in order to promote a pleasant room climate and prevent the formation of mould. Excess moisture can only be removed through adequate and correct ventilation. It is important that the moisture is removed at the point and time of origin. Preferably through a cooker hood in extraction mode (If permissible), a permanent ventilation system or intensive airing after cooking. Most people find relative atmosphere humidity of between 40% and 60% to be pleasant. The level at which the air feels “too dry” or “too humid” is also determined by the room temperature. It is recommended to have a window open during cooking especially when pots are boiling.
OPERATING MODE – A cooker hood draws in the vapours from the hob, filters them and releases the filtered air either to the outside atmosphere (extraction mode) or back into the kitchen (recirculation mode). Whilst extraction mode is by far the more effective, the choice of modes depends on many factors.
TIP – To reduce the amount of steam during cooking always recommend reducing to simmer once boil is achieved. Always use lids on pots and pans, this increases pressure and saves energy.
How To Adjust Starplan Kitchen Cabinet & Bedroom Doors

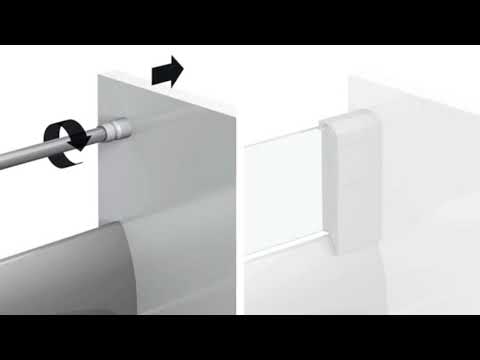
Starplan Sliding Door Adjustment Guide

Arrow above shows the area where the adjustments are made to fine tune the height of your sliding robe doors.

Slide up the cushioning strips until you see the allen head screw. There is one of these at the bottom of each door.

Turn the 5mm allen head screw clockwise to raise the door or anti-clockwise to lower the door.

Slide the cusoning strips back down again to cover the allen head screws.
Useful Service Numbers for Appliances
- Blanco Sinks: Tel - 01923 635200. Email - info@blanco.co.uk
- Blanco Taps: Tel - 01923 635200. Email - aftersales@blanco.co.uk
- Franke Sinks & Taps: Tel – 01614366280. Email – ks@info.gb@franke.com
- Schock Sinks: Tel - 01978660770
- Zanussi Appliances: Tel - 03445612612
- AEG Appliances: Tel – 03445611611
- Hoover Appliances: Tel– 03444995599
Email – contact.centre@hoovercandy.com
- Candy Appliances:
Tel No – 03446923607. Email – contact.centre@hoovercandy.com
- Electrolux Appliances: Tel – 03445613613
- Nordmende & De Dietrich Appliances:
Tel – 02890235088. Email – mail@gowanhome.co.uk
- GWA Extractors:
Tel – 02892617332. Email – info@gwa-ni.com
Please make sure you have your make & model of the appliance and the date of installation before contacting the service departments.